


Scandinavian Dutch Passion auto grow

Scandinavian Dutch Passion auto grow
Two auto harvests in one summer
This weeks grow diary is a Scandinavian Dutch Passion auto grow from Danish George, a self-sufficient Scandinavian cannabis grower who traditionally grows photoperiod cannabis varieties, he also grew the Dutch Passion Auto Duck variety in a previous diary.
In 2016 George grew a selection of Dutch Passion autos, he was so impressed with the speed, ease and productivity of them that in future he will grow more autos than photoperiod varieties.
The best quality modern autos are fast growing, meaning that even Scandinavian growers can get a couple of auto harvests per year.
Mediterranean growers
Mediterranean growers can achieve 3 successive auto crops per year. Autos stay around 1 metre (or below) meaning they are easy to hide in an outdoor environment. Outdoor photoperiod varieties remain very popular, but autos from the best quality seed companies are now a viable alternative.
The pictures and words below are from Danish George.
***
My set-up for the Scandinavion Dutch Passion auto grow is a small garden in the countryside. The garden has shelter to the west and north from my house and outhouses, and facing open farmland to the east and south.
The climate is coastal north European, with cold snowy winters, and moderately warm summers. We are only safe from frost during May to mid-October, giving me a growing season of max. 22-24 weeks outside. There are mostly westerly winds, but in late summer there can be long periods of strong east and southerly winds.


Scandinavian Dutch Passion auto grow
Easy to grow outdoors even in Scandinavia
I have both planted in the ground and in pots, and have tried many feminized photoperiod strains during quite a few years of growing cannabis.
One of the disadvantages of growing traditional photoperiods in the ground, in my opinion, is that many of the strains bloom really late. Therefore many things can go wrong during the long wait for maturity: Pests, wind, mould, and other uncontrollable factors.
Therefore I have been experimenting with growing in big pots, and putting up some boarding in a few places to shelter the plants, but there’s still been too much hassle in moving the 60-80 litre pots around, and keeping the plants with correct nutrients during vegging, and so forth. Also, theres not much to do, when heavy late summer winds from east and south comes for many days in a row, as they often do, without having to put up fences all over.
Fast harvest
When the Autoflowering strains that we see today began to hit the shelves of the seed banks, I quickly realized that this could be the answer to my wishes. So the last two years I have begun to grow a few Autos, just to see what they had to offer. I was really surprised to see how fast, and how MUCH could be harvested in the 11-14 weeks it takes to grow them.
So in 2016 I decided to dedicate ½ of my garden only to autoflowers. And, given the somewhat smaller yield per plant, to try to have 2 harvests in one season. It turned out to be one of my best decisions yet.
I have always started the seedlings in 2 litre pots, so I could move the tiny plants in and out after the weather, and to be able to put them under net, since I’ve discovered that the birds really like small cannabis seedlings. I have a small greenhouse and a shed with windows and plastic roofing, called ‘the orangerie’, where small plants also can stay in cold or very windy situations.

Autoflowering cannabis
Two easy crops in a single season
This gave me the idea, that I could cut about 3-4 weeks out of the total number of weeks needed in big pots, if I started the seedlings of ‘Batch 1’ in a sheltered place in April, and started germination of batch 2 just about 3 weeks before harvest of batch 1 sometime in July.
In other words I only needed 2 x 12 weeks ‘real outdoor growing time’ minus the 3-4 weeks where batch 1 and 2 were sprouting in small pots in my green house, or in another sheltered part of the garden, which would give me May through September to grow 2 harvests with an almost guaranteed minimum harvest. This is really good compared to many of my photoperiods, which many times could go well into September before the first flowers appeared.
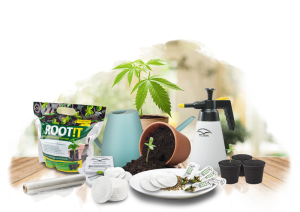
I therefore got some seeds from Dutch Passion (Auto Mazar, Auto Brooklyn Sunrise, Auto Think Different, Star Ryder, Auto Duck and Auto Ultimate) and started out.
Germination ratio was great
I popped the seedlings almost at the same time (a bit too late for my schedule due to cold spring conditions and my greenhouse not being finished yet) in mid May, and the germination ratio was great. A few plants (5%) turned out to be really small and stunted, but I’ve observed this the other years too, which makes me think that this might be phenos with too much Ruderalis in them.
But with a ratio of well over 90% making it to adult plants I think it’s ok. This was in the small 2 litre pots with the best soil the garden centre had for seedling cultivation and the like.
I figured from some of the posts I read, that I wouldn’t need too much nutrients during the shorter veg period, and got some growing soil from the garden shop (for planting tomatoes and so forth). This I put in some rectangular 80 litre pots that I had from last year(for 2 plants in each) and some new 40 litre pots.
Growing soil
The selection of ‘OK’ growing soil might have been one of my first mistakes. I guess I got a bit conservative looking at the price tags of the most expensive soil and the large amount of soil I would need, and settled for a cheaper kind in the end. It looked rather peaty to me when I put it in the pots with about 15-20% perlite.
Note to myself: buy the top notch soil Dummy – if you pay good money for the seeds and spend the whole summer looking after your plants, why save the last money on the soil? Get the stuff with great texture and added stuff like ground chalk, and what have you!!
Well, the plants were transplanted in the big containers, and soon started to grow very well, and it was easy to see the benefits of having them in small pots, so they could be moved around. The big square 80 litre pots stood by the fence to the neighbour, and due to their size couldn’t be moved.
Tip for next time
They were all Auto Mazars, they were the most vigorous growing type, and I learned another thing for next year: Don’t put two plants in the same container, even if you think theres room enough. I tell you – there isn’t room enough for those babies!! Maybe they grew so much, because they stood so close, so in the end they didn’t have room for too many side branches.
I’m sure that they would have been much better off standing alone in a pot, so I could move them apart, and would have yielded even better than they did, which brings me to my second note to myself: Use only 1 pot per plant, 40 litres should be perfect.

On the right track
Apart from the minor troubles, the progress of the autos really made me convinced that I was on the right track. When the flowering started in late June and the plant really started to mature, I began to calculate the estimated harvest dates, which I figured to be around the beginning of August. During this period, it was really strange to see the regular photoperiod plants still in vegging, while I was just about to start my earliest harvest ever! This was also the only time I started to add nutrients to the Autos on a regular basis, a Plagron PK 13-14 bloom enhancer.
As I wished to be ready with the second batch once the first was harvested, I started the germination of batch 2 in mid July. This is a gamble of course, because you don’t want to be forced to harvest before full ripeness, and you don’t want the seedlings to stay too long in the germination pots, but I turned out really fine, so I actually had the first Auto Mazars hanging on the drying string on July 29 – truly an amazing feeling for a Scandinavian grower!!


Autoflowering cannabis varieties
I then made the 3rd and final dumb mistake (hopefully I’ll be done with them next season) as I figured, that I could get away with removing only some of the soil (in the middle of the pots where the main roots had been), change the soil, and then place the new plants there.
The results weren’t catastrophic, but clearly showed, that this was a bad call, due to the fact, that all the remaining soil was just were too full of nutrient residue, salts and whatever, thus stunting the new plants a bit. Luckily I also had gotten some extra pots and gotten the best quality soil for those, and they grew perfectly. I don’t really have an explanation of why I, a seasoned grower, don’t do it perfect the first time around.
But as growing is not the only activity in my life, sometimes you just try to cut some corners for your own convenience, but this is almost always a bad idea.
Second batch
With the late summer still in full force, the second batch also performed very well, and the last plants were harvested during the first week of October, right in the middle of the harvest of the photoperiod plants. This also highlighted another advantage of the Autos: the size. When harvesting this far north, it’s great to get the plants inside sheds for initial drying if a long period of rain is coming.
The traditional plants take up a lot of space, but most is long branches with small clusters of bud, quickly filling a whole room, while the Autos are just a single small plant with almost nothing but bud, and therefore much more manageable.
The buds are quite different on autos I think. There is almost nothing but bud, and the surrounding smaller leaves are also more heavily frosted than on regular plants, (where the buds are more traditionally nuggets) so you can actually harvest a bit more from autos without compromising the quality or even the ‘bag appeal’ because even if it looks different it’s somehow just right.


Yields were between 50-80 g per plant, but with even more experience and care I hope to increase this next year. With two harvests in one season, this is really equal, or actually better than traditional photoperiods, since you have 2 grows in the same year – its good insurance in the event of problems such as pests, mould or other maladies.
Next year I’ve already decided, my whole grow will be Autos, with maybe a regular feminized or two, just for old times sake. Strange how the world of cannabis seeds really has changed in a very short period.
Scandinavian Dutch Passion auto grow
Learning points for next season
- Get the right size of container for all your plants. 30 litres would be perfect, but are not easily available, so anything from a 20 litre mason bucket to a 40 litre bricklayers tub should do. Remember a good irrigation hole in the bottom to let excess water drain away. Also maybe get a hand truck for moving containers around the garden for shelter during strong winds.
- Get the really good potting soil from the beginning. There is special soil in the garden center for seedlings, and potting soil in many varieties.
- Use only nutrients very sparsely during veg. a sprinkle of tomato fertilizer after 3-4 weeks should be enough, and then a good bloom addition for perfect bloom in the last 4 weeks or so.
But most importantly
- Remember to enjoy yourself, and maybe the last stuff from last year at the bottom of your jar.
1 Comment. Leave new
Nice report! I’m growing some autoducks for the first time this year. Half I have topped, the other half I will give LST. I wonder what difference that makes.