


Growing cannabis indoors allows the grower to optimise lighting, temperature, humidity, air flow, nutrients and other key environmental factors. Indoor cannabis growing also allows you to control pests, something that the outdoor grower can’t always guarantee. The result is that well grown indoor cannabis can reach the very highest quality levels. No wonder that millions choose to grow weed indoors with the finest cannabis seeds and best grow room conditions. Whether you are a beginner aiming to start the right way or a skilled grower searching for the best ways to optimise the quality of your crops, this essential indoor cannabis cultivation guide is a keeper!
How to grow cannabis indoors

Indoor cannabis cultivation benefits
Outdoor/greenhouse cannabis growing has plenty of pros but a few occasional challenges such as cloudy/stormy weather, cool conditions, pests and other risks. Indoor cannabis growing may be more expensive due to electricity prices and the purchase costs of the tent, LED, fan, filter etc.
That being said, a high quality and well thought-out indoor grow room allows the grower to push every last bit of genetic potential from their cannabis seeds by optimising all the conditions and removing any limiting factors which might limit growth.
Get your indoor grow conditions right and you can look forward to the best possible quality levels with a terpene profile that will make you gasp in delight and cannabinoids that will refresh your soul with memorable pleasure.
Whether you prefer growing with autoflowering cannabis seeds or feminised seeds, the ultimate goal is to produce a harvest of the finest possible quality. An indoor grow room/tent fitted with a solid LED, good genetics and a skilled grower has every reason to shoot for buds with 20-25% THC levels. Street weed and coffeeshop cannabis average around 15% THC. Serious growers know that growing their own cannabis is the best way to guarantee top quality buds for the minimum price.
So long as you’re not trying to grow cannabis in your attic/loft during a heatwave, an indoor grow generally allows you the maximum control over the grow environment. This is especially true for the grower who has carefully planned the location of their grow room and invested in the necessary equipment to produce optimised conditions. This may include a quality LED light and an extraction fan that is able to adjust speed/power as required to maintain temperatures and humidity in the sweet spot. Grow with slow release organic nutrients (avoiding the risks of under/over feeding with bottled nutrients) and you won’t necessarily need years of experience to grow connoisseur quality buds.
Growing cannabis indoors allows you the chance of multiple harvests each year. Unlike the outdoor grower who has to work within the limits of their grow season the indoor grower can grow all year round. Basements and bedrooms tend to be popular indoor grow room locations with many preferring to grow in a modern grow tent. Rooms that are prone to temperature extremes (e.g. lofts) are less favoured since they can be unusable in mid-winter and mid-summer.
Growing cannabis indoors does come with a small risk risks of pests. But with a few sensible precautions and a quick response (if pests are seen) the indoor grower should be able to get on top of any pest issues quickly. Use of predator insects is an increasingly popular (and chemical-free) way of dealing with indoor cannabis pests. Some growers pro-actively release predator insects whether required or not, the costs are low and there are no downsides.
Some outdoor growers feel nervous about growing cannabis in greenhouses or the great outdoors. Growing indoors allows you a completely private hobby, no-one other than you need know about it. A useful tip is to ensure you always have a working carbon filter and a spare one – one day you will need it!
Indoor growing allows you a safe and secure location for indoor cultivation. Those concerned about security can install indoor/outdoor CCTV, improved outdoor lighting and other measures.
Indoor cannabis growing stage by stage
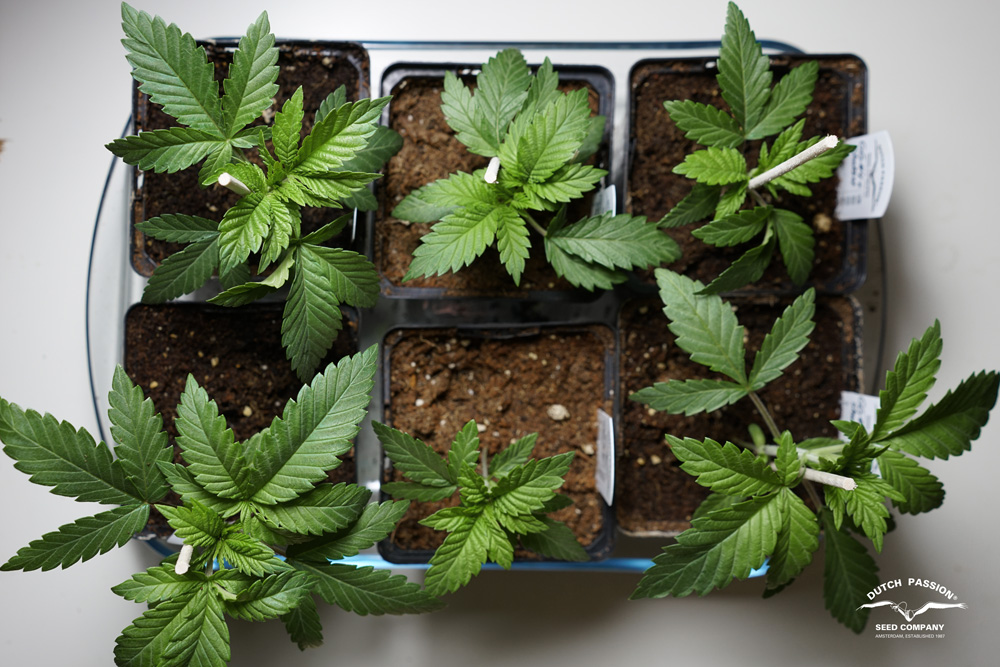
Watching your cannabis seeds germinate and grow into mature female plants is a great joy and source of satisfaction. Many cannabis growers enjoy the experience of growing just as much as they enjoy the harvest! Growing cannabis indoors is often more than just a way to be self-sufficient in premium quality, low-cost buds. It’s an absorbing and rewarding hobby in which continual improvement & learning provides great fulfilment.
Photoperiod feminised seeds remain the preferred choice for many. Once germinated, the seed transitions through several different stages of life before harvest, typically 3-4 months later.
Less experienced growers may prefer the simplicity, speed, convenience and wide-growing latitude of autoflowering cannabis seeds. Autos typically grow from seed to harvest in around 11 weeks, thats often a few weeks faster than photoperiod feminised seeds.
Old school growers often enjoy the experience of growing regular cannabis seeds, selecting male and female offspring for further growing/crossing.
Many cannabis seeds germinate in 2-3 days, most do so in 3-5 days but some can take as long as 1-2 weeks.
Serious growers don’t mind paying upwards of €/$/£100 for a pack of 10 cannabis seeds so long as the genetics have been expertly bred and produce pro-results. So it makes sense to shoot for 100% germination rates. Use the damp cotton pad method for best results. One important tip is to cool-store your cannabis seeds in the fridge for maximum longevity.
Often regarded as the first week or so following cannabis seed germination.
Typically around a month when growing autoflower seeds (and a maximum of 2 months), this exact time is determined by the cannabis genetics. The grower determines the length of vegetive growth with photoperiod feminised seeds.
With low/moderate light levels required in the vegetative stage, growth will seem initially slow and will pick up pace as the plants age and increase in size.
When growing photoperiod feminised cannabis seeds most growers tend to grow their plants under 18-24 hours of daily light for around 4-6 weeks.
Longer periods of veg growth favour larger final plant sizes and heavier yields. Often growers prefer to grow with a blue-dominant light spectrum for best results in veg growth. This is possible with colour-adjustable LED grow lights, though some growers use e.g. blue-spectrum ceramic metal halide lights.
During the vegetive growth stage some growers like to consider the use of high stress training and/or low stress training to prepare the plants for heavier final yields.
Growing cannabis indoors requires intense light with a heavy red content in the spectrum during bloom. Light intensities are steadily increased as bloom progresses, with maximum light levels reached in the last few weeks before harvest.
Ensure that your LED light, carbon filter and fan are appropriately matched to the size of your grow room. Research your choice of cannabis seed supplier and your preferred genetics well.
Grow tents with less vertical growth space may be better suited to shorter indica/indica dominant cannabis strains or those that prefer growing with the SCROG method. Taller grow rooms may find it easier to accommodate taller, stretchier sativa strains.
Some growers find that growing a small number of large plants with the SCROG method gives best results for them. This often suits the slightly more experienced grower. The less experienced growers may find that growing/flowering cannabis plants in the natural way, without training, is easier.
As your plant approaches harvest the indoor grower has time to consider how ripe they want their harvest. If you’re not sure, you may want to collect buds at the normal harvest point and compare them to buds that were harvested early and late. Your preference may influence when you time the harvest of a future crop. When growing your own cannabis indoors, it’s up to you to select the perfect moment of ripeness that suits you!
Not all growers believe in the principle of flushing cannabis – the process of ‘feeding’ with just pure water for the last week or two in an attempt to create a better/purer tasting result. But many growers remain firm believers in flushing despite claims that flushing has no beneficial effects.
Find out what you prefer and do all you can to tailor your harvests for your precise personal taste. Getting your harvest right is crucial, you have worked hard for months with the best cannabis seeds and equipment. Make sure that nothing can spoil the timing and result of your harvest.
Note that allowing an extra week or two at the end of bloom can give you a heavier harvest and a more powerful, sedating effect. One privilege of growing cannabis indoors is that you can allow your plants to ripen fully, free from commercial pressures to chop early and start the next crop. Take your time – enjoy, learn and improve with each crop.
Related:
The cannabis ripening process
Indoor cannabis initial setup and equipment

When growing cannabis indoors many self-sufficient growers opt for a grow tent around 1.2m x 1.2m (4ft x 4ft) and will match the fan, filter and light to that sized tent. An indoor grow room complete with quality LED, fan, filter etc will set you back around €/$/£1000 or more.
That can seem excessive for some, who opt for cheaper systems with HPS lights and budget fan/filter combos. If funds are initially limited, you can always progressively upgrade your grow room as your passion and experience improve. Indeed, continuous grow room improvement/investments is precisely what many growers love to do.
One final thought, spending €/$/£1000 or more setting up a new grow room with an LED may seem expensive, but the costs are likely to be repaid from the value of the first harvest.
Micro-growing is possible in spaces as small as 60cm x 60cm but is unlikely to meet the bud needs of a daily cannabis lover. Work out how much space you can use for your grow area and do your best to maximise the productive use from this space. Many growers tend to opt for larger grow spaces once they realise how much fun they are having.
Related:
Cannabis micro growing how-to guide
HPS will do a job for a budget price but all serious growers prefer LED. With inherently lower heat levels of heat stress, longer life and an optimised light spectrum LED automatically delivers higher cannabinoid and terpene levels.
A basic budget fan may not have adjustable speed and can be noisy. More sophisticated options have a near-silent operation and can vary their output according to grow room temperature/demands.
This is another area where spending a little extra can deliver significantly extra peace of mind. Budget filters may only last a grow or two. More expensive professional carbon filters can last a year or two. It’s worth noting that one of the biggest contributors to failed grows, especially when growing in ‘illegal’ countries, is when the grower fails to control grow room aroma.
What is the ideal space to grow cannabis indoors?
Many growers have limited options when it comes to growing cannabis indoors. Often bedrooms are used, with the exhausted air vented indoors (not ideal, but often done).
If you do have options it pays to choose a room which doesn’t see large temperature variations and doesn’t suffer humidity issues. The following considerations are worth contemplating when choosing the best place for your indoor cannabis grow.
Attics are often used for indoor cannabis growing in spring and autumn/fall when temperatures are not hitting the extremes seen in mid-summer and mid-winter. Remember that large temperature fluctuations cause plant stress which limit potency/quality. Two of the biggest difficulties for attic growers are extreme summer heat and low winter temperatures.
Steady year-round temperatures are often one benefit of growing in the basement. This allows you to grow in any season. If your basement is damp this can cause increased risk of mold/bud rot especially in late bloom. Basement growers often select high-powered extraction fans which can move the extracted air vertically upwards a storey/floor or two to be extracted e.g. from a roof vent/chimney.
If you have an existing spare room or closet you may not need a grow tent. Growing cannabis indoors can be done in small cupboards. Some DIY skills may be required to accommodate air extraction etc.
Garages can be a convenient place to grow so long as winter temperatures don’t drop too low. Garage growing also allows the DIY enthusiast the option to disguise the grow area behind a false wall made from e.g. plasterboard. As with all indoor grows, efforts need to be made to scrub extracted air of all smells… just in case.
An off-the-shelf grow tent or grow box is a fast, easy and convenient way to create your indoor grow space. They come in a vast range of sizes in varying quality levels. What’s more, if required you can strip down a grow tent and dismantle your grow room in an hour or two in an emergency.
Those confident in their own DIY skills (or the DIY talents of a close friend) can build their own room often with stud walls to the required size. Some people go to elaborate lengths to create disguised entrances, hidden doors or crawl tunnels for maximum peace of mind.
Choose the best area you can for your indoor grow location recognising any restrictions or limitations that may place on your grows. Loft growers may not be able to grow all year round, for example.

Choosing the best cannabis seeds for indoors
Cannabis genetics play a huge role in determining the quality of your harvest. Even the best equipped grow room in the world won’t be able to deliver high THC results from low-end cannabis seeds.
You may spend around 3 months, or more, growing your seeds. Therefore, don’t be afraid to spend the necessary time contemplating the various options available to you. Competent cannabis seed suppliers should offer you detailed expectations of likely potency levels, plant size, yield and effects.
Photoperiod feminised cannabis seeds grow in veg mode until daily light hours are reduced to around 12. This allows the grower the chance to determine how long (and how large) to grow the plant. In vegetive growth (typically 18-24 daily light hours) the plant produces roots, branches and leaves but no buds. Many growers, including those specialising in SCROG growing find feminised seeds allow maximum control over the precise moment to initiate bloom.
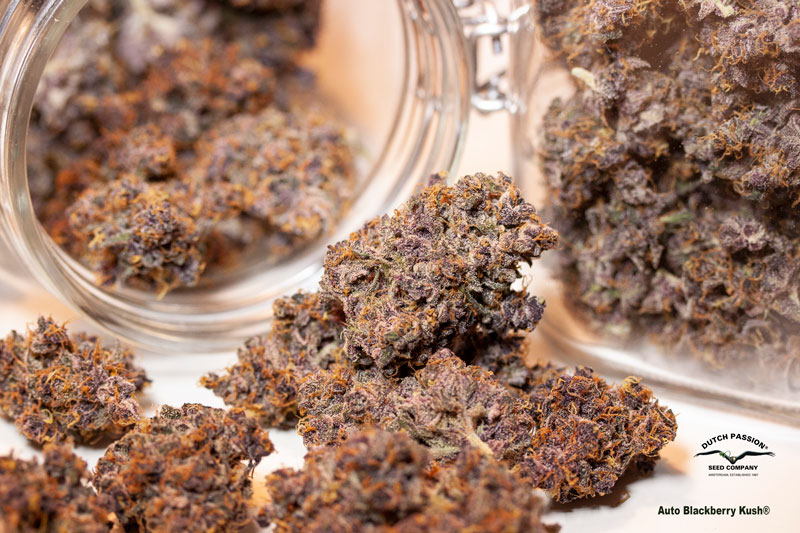
Autoflowering cannabis seeds grow from seed to harvest, typically under 20 hours of daily light in around 10-11 weeks. Some strains such as Auto Blueberry and Auto Blackberry Kush can complete the growth cycle in as little as 8-9 weeks. Others such as Auto Ultimate can take 12-15 weeks with correspondingly higher yields. Many growers prefer the speed and simplicity that comes when growing autoflower seeds, especially those from the top-tier cannabis seed suppliers that take the time to fully stabilise the genetics, optimising potency and yield.
Indica and indica-dominant cannabis seeds often give rise to short, squat plants with broad-fingered leaves. Conversely, sativa & sativa dominant seeds often tend to produce stretchy, tall plants with greater internodal spacing than indica plants.
The amount of available head-room in your grow tent/grow room could affect your choice of indica vs sativa cannabis seeds. Likewise, your preferred grow method could also determine the type of strains you grow. For example, SCROG growers may prefer strains that can easily be bent/worked into a SCROG screen. Not all strains are suitable for all grow rooms and methods, so research carefully and ensure you get accurate genetic descriptions from your cannabis seed supplier.
Many growers enjoy the variety that comes from growing multiple cannabis strains together. However that can bring certain challenges, for example if the strains grow to different heights. Use of low stress training (LST) and high stress training (HST) techniques can allow you to maintain a level canopy of buds all within the optical sweet-spot of your grow light.
Growers keen to enjoy a multi-strain harvest shouldn’t feel daunted by the challenges, especially those with a little experience in plant training/topping techniques. Lots of home growers appreciate the extra variety in the jars that comes from planting cannabis seeds from different strains.
Regardless of your preferences, always select cannabis seeds based on your situation and requirements. Smart growers often look at online grow reviews as part of their research before making their final choice. Experienced growers can find that plant training techniques (low/high stress training) can greatly improve productivity and yield.
How to set up an indoor cannabis grow room

If you’re upgrading your grow room, or setting one up for the first time, you may feel a little overwhelmed with the endless array of options. A knowledgable local grow shop owner is often a great source of advice. Some online grow shops also offer solid advice.
In general, less experienced growers may find it easier to initially opt for simpler options. Beginners may find it considerably easier to grow their cannabis seeds in large-aerated containers of soil with slow-release organic nutrients (e.g. BioTabs) rather than attempting a hydroponic SCROG.
Research your options carefully, recognising the strengths and limits of your own experience/situation and remember you can always upgrade your grow room (and grow style) as your confidence and experience evolves.
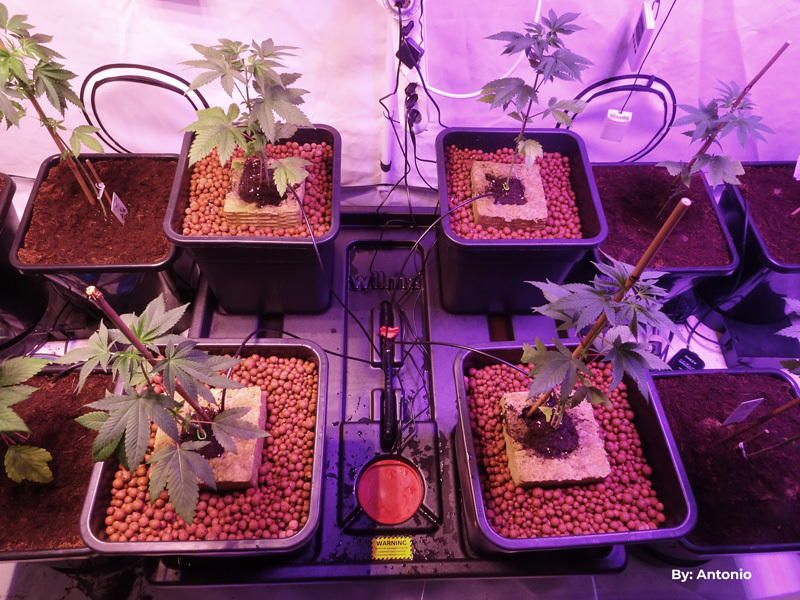
1. Choose the best-suited growing containers
Cannabis seeds can be grown in most types of grow container so long as the basics are present i.e. nutritious moist soil. But experienced growers have known for some time that those containers that offer maximised levels of root aeration tend to produce the healthiest root zones and therefore the largest plant with heavy yields.
Many professional cannabis growers, alongside serious self-sufficient growers, feel they get superior harvest quality/quantities when using aerated grow containers such as air pots, felt sacks or similar. These allow great levels of root oxygenation that standard non-aerated containers. Cannabis roots need oxygen to survive and thrive. By increasing oxygen levels in the cannabis root zone healthier, stronger growth is achieved.
Even when growing in a highly aerated grow medium such as a light-soil mix or coco fibre, root aeration and overall growth rates are benefitted by the use of an aerated grow container. Some growers push root aeration to the max, for example growing cannabis in coco fibre/air pot in combination with an air-stone at the bottom of the air pot.
2. Define a watering system
A plant as flexible as cannabis can be grown with numerous different grow methods and watering systems. Which grow method best suits you will depend on a few factors.
How much complexity are you prepared to tolerate? How much automation do you want/need? How large is your budget? In general less experienced growers are advised to keep the watering system as simple as possible initially. Watering your plants manually is one of the more common methods, but there are a range of systems to suit all needs and budgets.
Perhaps the two most common errors seen when growing cannabis are the tendencies to over water and over feed. These errors are especially common among less experienced growers who may apply the (incorrect) logic that more water/food will produce larger plants.
The opposite is true, too much water will cause the cannabis roots to sit in an oxygen-deficient environment where they will eventually rot. Too many nutrients will burn the cannabis roots, permanently limiting future growth. Whichever grow system/medium you use, be sure to do all you can to keep your plants in the nutrient sweet spot, with neither under feeding nor over feeding.
Cannabis hydroponics is the method of cultivation without soil. Various hydroponic grow methods have been created and all work well. So long as the cannabis roots are supplied with essential minerals, moisture and oxygen they should thrive and support fast plant growth, even without the presence of soil. Fans of cannabis hydroponics claim it is the fastest way to grow cannabis, outstripping growth rates in e.g. soil or coco fibre.
One common feature of hydroponic systems is a focus on ensuring that the cannabis roots get sufficient oxygen, despite the often wet/submerged conditions. Although all different hydroponic systems may have slightly different, soil-free designs, they all incorporate the principle of allowing oxygen direct access to the roots. Here are some of the more popular cannabis hydroponics options.
Note that these methods tend to suit the more experienced cannabis grower who is able to measure pH (a measure of acidity) and E.C. (electrical conductivity, a measure of the mineral content in a solution). Use of pH and E.C. meters require the grower to be able to correctly calibrate, read and maintain their meters.
Cannabis aeroponics works by suspending the roots in an oxygen-rich mist of water droplets. The water droplets contain the traditional nutrients and minerals to nourish the plant. Not recommended for beginners, aeroponics tends to suit the more experienced hydroponic grower capable of managing the various technical demands.
Claimed by many cannabis hydroponics fans as the fastest way to grow weed. The cannabis roots grow downwards from a net into a bucket of water/nutrients. Normally you might expect the roots are to rot when growing in a e.g. 25 litre bucket of water. But the presence of a powerful air stone at the bottom of the bucket (connect to an air pump) bathes the roots in a constant flow of oxygen-rich bubbles.
A cannabis dripper system often grows the cannabis plant in an inert grow medium such as clay pebbles. A small pump forces the nutrient solution up from underneath the roots and drips it into your chosen grow medium. The roots have open access to oxygen and are fed by a gentle stream of nutrient drops. As with all hydroponic grow methods the grower needs to check nutrient concentrations regularly and refresh the nutrient reservoir on a regular basis.
The ebb & flow hydroponics method regularly floods your grow containers with nutrient solution to allow them to feed. After a specified time the fluid is drained away allowing the roots access to oxygen before the process is repeated. A grow medium such as clay pebbles, glass wool, coco fibre etc is often used.
With the cannabis nutrient film technique (also known as ‘NFT’) minerals/nutrients are pumped from the reservoir onto a thin absorbent mat. The cannabis roots grow in and around this mat eventually forming a thick layer of roots as they absorb the required nutrition. Because the roots are not completely immersed in liquid they have access to atmospheric oxygen and grow rapidly.
A wick system is a passive hydroponics method that sucks up liquid to the root zone using a wick rather than a pump. Various versions of the wick system exist, often based around a grow medium of coco fibre, perlite, vermiculite etc. The grow medium has a wick, e.g. an absorbent length of rope, twine etc dipped into a lower nutrient reservoir. The wick transports liquid from the reservoir to the grow medium via capillary action.
3. Simulate the desired climate
No matter how good your cannabis grow system, you won’t get the best results unless you can create optimised conditions in which to grow your cannabis. This means getting temperatures, humidity levels etc optimised at each stage of growth. Remember the conditions required for your plants will vary greatly as she transitions from cannabis seed to harvest-ready female.
Germination is often regarded to be the time taken from planting the cannabis seed to the stage where it has produced it’s first cotyledon leaf pair. These are the initial (non-serrated) leaf set which is formed at cannabis seed germination. Germination often takes from 2-10 days in dark conditions, no nutrients are required.
Related:
Best way to germinate cannabis seeds, moist cotton pad method
Cannabis seedlings require mild conditions, light levels can be quite low at the start but need to be increased as the seedling becomes older to reduce stretching. Nutrition, if required at all, is at very low levels in order to avoid permanently damaging the delicate root network.
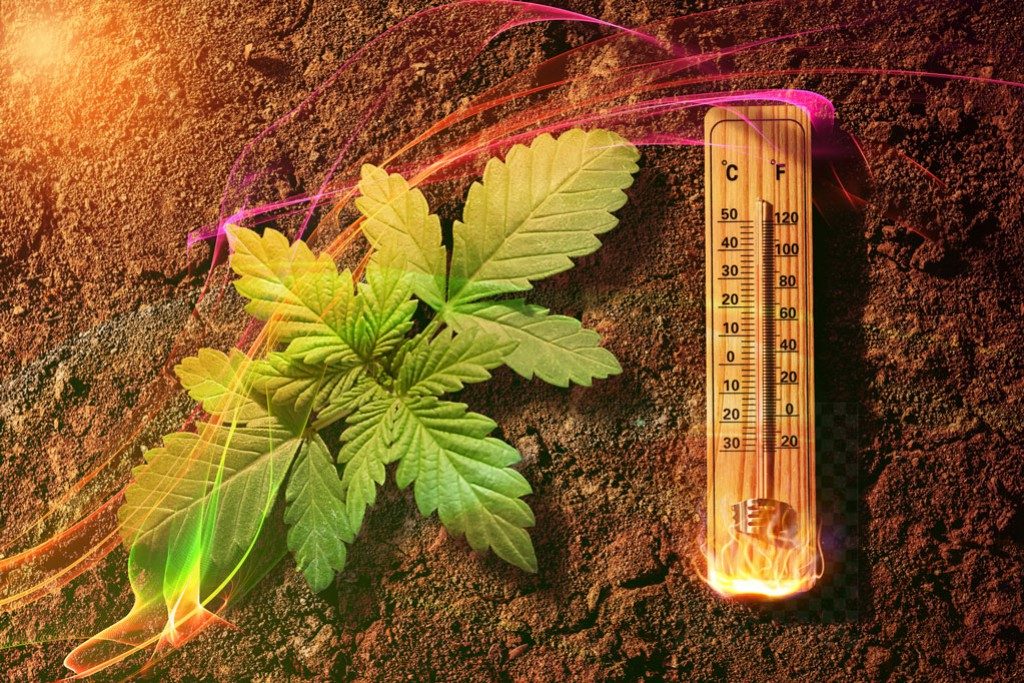
High humidity levels can be tolerated by seedlings and may even be useful (e.g. for cuttings) until the root network is fully developed. Temperatures of around 20-25ºC (around 70ºF-77ºF) give good results for cannabis cultivation, from germination to bloom. During the seedling stage (or when rooting cuttings) high humidity levels of around 65-70% can be used. Early root development may be slow, a humid environment may be useful to ensure the seedlings have sufficient moisture until the roots are fully established.
Related:
Cannabis seedling stage how-to guide
During cannabis vegetative growth your plant will produce roots, leaves and branches but no buds. When growing autoflowering cannabis seeds the genetics determine the length of the veg cycle.
When growing photoperiod feminised seeds the grower determines the length of the veg cycle – plants are forced into bloom when daily light hours are cut from around 20 to around 12. For vegetative stages humidity is usually kept around 60-75%. For clones that have not rooted yet keep humidity very high, about 85-90%, best way to do this is by using a dome (mini plastic greenhouse). Temperatures around 23ºC (75ºF) are good for veg growth.
Related:
Cannabis veg stage, how-to guide
Bloom begins ‘automatically’ at a time of the genetics choosing when growing autoflower strains. For photoperiod feminised strains bloom begins when daily light hours are cut to 12. Hormonal changes associated with bloom in the cannabis plant biochemistry forces the production of female flowers, complete with lashings of resin in a process that often takes around 9 weeks. Good air circulation is important. During bloom it is important to ensure humidity is kept as low as possible, below 50% is preferred. This minimises the risk of bud rot/botrytis in dense blooms, often a worry for growers in high humidity conditions.
Most indoor growers aim for a steady temperature of around 24ºC/75ºF when their lights are on and perhaps a couple of degrees cooler when the lights are off. But during bloom, some growers deliberately drop the ‘night time’ minimum temperatures to induce some autumnal hues in the buds, increasing the eventual jar-appeal.
The cannabis flowering stage is critical to the eventual harvest quality and quantity. Master the conditions required and you can look forward to connoisseur quality buds! The following expert guide is packed with pro tips to follow and explains the man pitfalls to avoid.
4. Provide optimal lighting to your plants
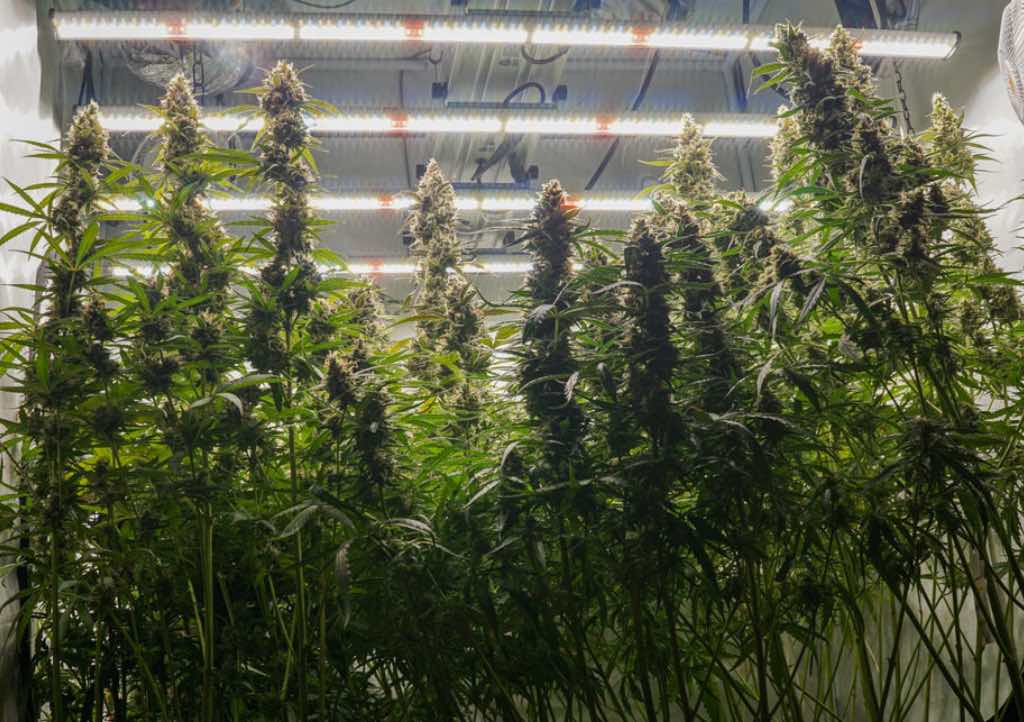
Cannabis requires high light levels during bloom to allow the cannabis genetics to reach their full potential. Even high quality cannabis seeds will produce puny harvests and small buds when grown with inadequate light intensities. Choosing the right cannabis lights for your grow area and knowing how to use them correctly is one of the most crucial aspects of indoor cannabis growing.
Unfortunately there is a massive range of grow light technologies with prices from budget levels all the way up to professional grade LED. When it comes to the potentially expensive time to buy/upgrade your grow light it really is worth taking your time and considering the options carefully.
How to calculate your lighting needs?
Your grow light, especially if you opt for LED (the choice of most serious/pro growers) will probably be the most expensive part of your indoor grow room. Some growers are tempted to save cash and use a slightly underpowered light, but this is false economy since harvest amounts will be reduced.
When growing cannabis indoors many use a 1.2m x 1.2m (4ft x 4ft) tent. Often a 400-650W LED will be used, or perhaps a 600W HPS if a budget option is required. This will allow PPFD light levels of around 750-1000 μmol/m2/s which will allow optimised bloom. Professional grow light manufacturers will list the recommended hanging heights for their light at various stages of growth. They should also clearly explain the PPFD light intensities in grow tents of different sizes.
Related:
In depth guide to grow light PAR, PPFD, DLI and Wattage
Best types of grow lights for cannabis

Here are the main light choices for growing cannabis indoors.
The most expensive option, an LED of typical power (around 400-650W for a 1.2 x 1.2m tent) will often cost in the region of €/$/£750-1000. With minimal levels of heat stress, an optimised spectrum and a 10+ year lifespan LED’s deliver proven higher cannabinoid and terpene levels than HPS.
Compact fluorescent lights are often used for germination or seedlings. The gentle, soft light levels are ideal for the lesser lighting needs of smaller plants. They are generally not used as much for bloom.
The most popular budget option, 600W HPS lights (suited to a typical home grow tent) are available from €/$/£100 or less. But the performance and results won’t match an LED. HPS bulbs need replacing after every couple of grows, they emit large amounts of heat and don’t benefit from the same fine-tuned light spectrum.
Ceramic metal halide lights are often regarded as superior to HPS. They have become popular in the last few years, though many feel that CMH lights lack the excellent performance of the best LEDs.
Many pro-growers like to add extra UV light to their grow room to mimic the effects of the sun. UVB in particular is thought to encourage higher THC levels and extra resin production. UVA is thought to increase terpene levels in the cannabis buds. One bonus side effect of UV light is that it can reduce/eliminate flying pests such as fungus gnats (often found in soils containing wood).
Mounting your light fixtures
You have researched your light options carefully and maxed out your budget to get the best grow light you can afford. Now you need to make sure that the light is mounted correctly. Ensure that your light is hung level, some growers use a spirit level to ensure the light is level and illuminating the grow area evenly.
You also need to hang the light at the right height above the canopy. Your grow light manufacturer should give detailed hanging heights and (if necessary) the associated power levels.
Monitoring and adjusting your lighting
Many grow lights, especially modern LED lights, come with adjustable lighting. This allows the grower to slightly adjust/increase their grow light power as their plants mature. Few growers have a light meter that allows them to measure PPFD, instead they rely on their experience and the light manufacturers recommendations.
5. Achieve an optimal grow room air flow
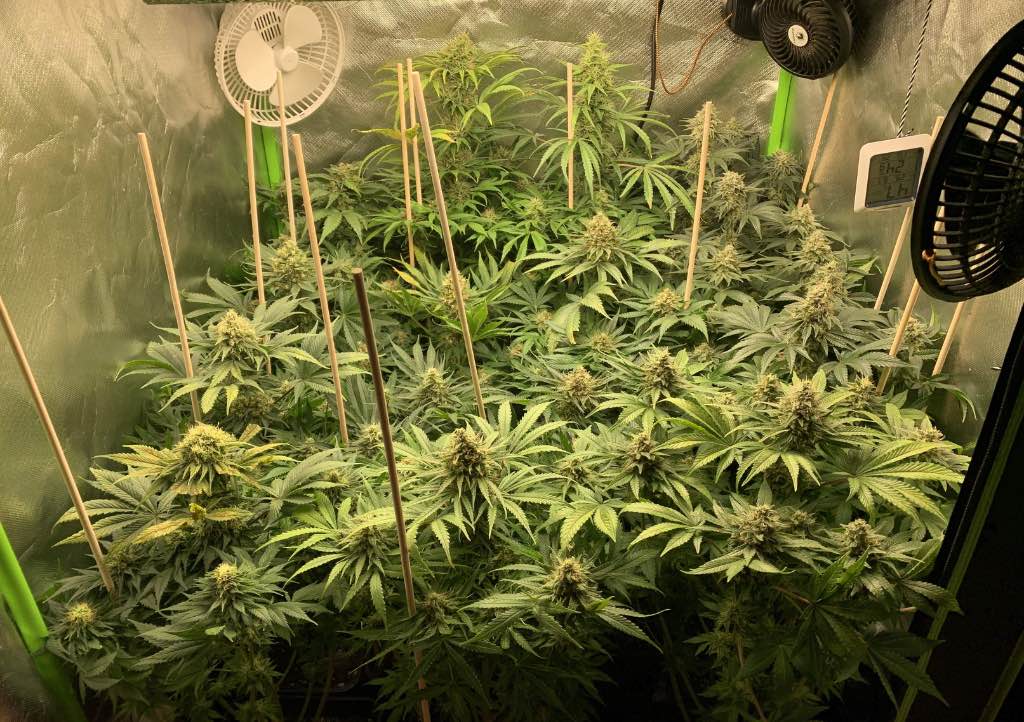
Oxygen and Carbon Dioxide are two essential ingredients for the growth of cannabis. Ensuring a good air flow through your tent is another of the often overlooked aspects when growing cannabis indoors. Not only does all the air in your grow room need to be replaced perhaps 2-3 times every minute, but you will need circulation fans inside your tent to ensure no ‘dead spots’ of stale air.
Air in your grow room tends to get hotter and more humid, removing this and replacing it with fresh air allows your plants to grow in a healthier environment.
Mold/bud rot can be real threats when humidity levels are allowed to creep upwards during bloom. Once your plant is stressed fighting disease or environmental irregularities (e.g. plants drying out almost completely) it can be more prone to attacks from pests.
Supplemental CO2 can be used to increase growth rates but this only really makes sense for professional growers who have fully maxed out their light intensity levels. Many ‘CO2 generators’ are used when growing cannabis indoors. The simplest ones are bags containing mycelium which emit a steady stream of CO2. CO2 can also help growers that are battling high temperatures, plants seem to thrive more in higher temperatures when they have higher CO2 levels.
Ensuring your plants have good nutrition, lighting and a good grow room environment will allow them to grow into strong plants, resistant to health issues. Some growers also like to offer nutritional tea/vitamin supplements to their plants.
Indoor cannabis grow room ventilation
Many home growers like to keep a spare carbon filter at home for the inevitable day when they notice their existing filter is starting to fail. For extra security some growers will position an ozone generator in the exhaust air stream. The ozone chemically removes any traces of cannabis aroma that managed to escape the carbon filter. As well as ensuring a good flow of fresh air into the grow room (to optimise plant health and minimise chances of disease) growers need to ensure that the exhaust air is scrubbed clean of any cannabis aromas.
Indoor cannabis grow room air circulation
Small clip-on fans are often used by growers to ensure that no pockets of stale air can remain in the grow room. These can also be positioned underneath the plant canopy, an area often neglected by indoor growers. Likewise, any dead foliage, fallen leaves, dirt etc should also be cleaned away. A little extra effort to ensure good grow room circulation can avoid problems later on.
Indoor cannabis grow room CO2 supply
Hobby growers probably needn’t worry too much about supplementing grow room CO2. It only really makes sense to introduce extra CO2 when the grower has eliminated every other bottleneck restricting growth. Often CO2 is used when grow room PPFD (light intensity) levels are at/above 1000
Most growers probably won’t need to worry too much about introducing extra CO2 when growing cannabis indoors. However some licensed/pro growers may find it cost effective.
Related:
Cannabis grow room ventilation guide
6. Maintain a clean and safe environment
Keeping a clean and safe grow area takes very little effort at all, especially if the grower keeps on top of the grow room with basic housekeeping/tidying. Not only is it good growing practice to ensure a tidy tent when growing cannabis indoors, it can prevent pests/disease outbreaks saving the grower from future problems.
Cleanliness and safety measures
Never allow dead leaves and soil/nutrient/grow-medium mess in your grow room. Dead leaves/vegetation can allow disease (or pests) to take hold.
When growing cannabis indoors, problem prevention is always better than problem curing. Modern grow tents have wipe-clean surfaces allowing you to clean the mess up and wipe down the surfaces. A small hand-held vacuum is perfect for hoovering up any soil/coco-fibre dust.
Indoor cannabis odour control
Especially in countries where growing cannabis indoors is still illegal, growers need to take extra care to deal with any cannabis aromas. If not they risk broadcasting the presence of their grow room. Use of good quality carbon filters (and stocking a spare one at home, just in case) is always recommended.
7. Soil and other media for growing weed indoors

Many people find soil is a simple, easy grow medium when growing weed indoors. Use a large enough volume of it (especially in conjunction with slow-release organic nutrients such as those from BioTabs) and you needn’t worry too much about needing to add mineral nutrients throughout the grow.
Plenty of other growers find coco fibre easy to grow in – perhaps with slightly faster plant growth compared to soil. But other options are available too, such as growing in fibre glass, rock wool (and mapito) clay pebbles, perlite etc.
Growing cannabis in soil is an easy way to get great results when growing cannabis indoors, whether you are an experienced grower or just starting. Many growers also claim that the richest cannabis taste comes from organic, soil-grown weed.
The best type of soil for indoor cannabis
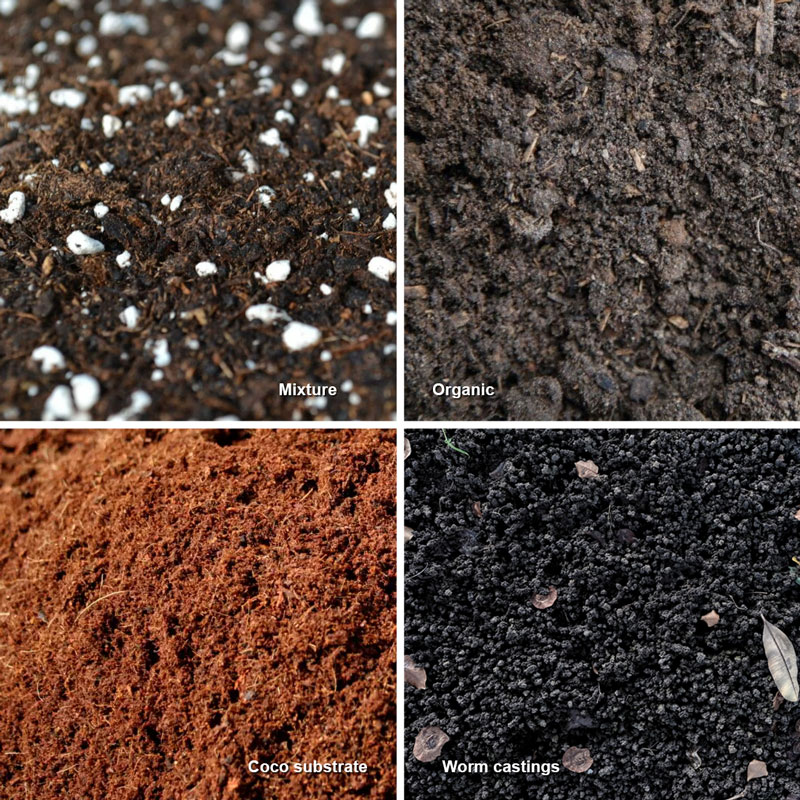
A good quality soil is light, aerated and contains the necessary nutrients and minerals to sustain plant growth. Often growers have their preferred soil blend from their local (or online) grow shop.
Numerous soil brands are available, some lighter options more suited to seedlings and fortified soil blends suitable for more mature plants. Some wood-free soil mixes claim to be free from pests such as fungus gnats and are popular with many growers.
All good quality pre-prepared grow shop soils should have a light fluffy texture, not too dense/heavy. The main brands all deliver good results when growing cannabis indoors.
The larger the grow container the greater the volume of soil your plant has. At the same time, large grow containers offer a large reservoir of nutrients which may sustain the plant into late bloom necessitating perhaps only a light top-dressing of bloom nutrients as the plant approaches harvest.
Many growers like to combine a reputable, good quality soil brand with an aerated modern grow container such as an air pot or grow sack. It’s not uncommon for containers of 50 litres+ to be used when growing weed indoors. Large, aerated grow containers favour the extensive root network necessary for growing the largest plants, often with minimal plant maintenance.
Growing cannabis indoors with coco fibre
Growing weed indoors using coco fibre has become very popular. Many adepts claim faster growth rates than those seen in soil, though not as fast as hydroponically grown cannabis. Coco growing usually requires a basic mineral nutrient mix made from a simple ‘Part-A’ & ‘Part-B’ nutrient blend.
As with soil, numerous reputable coco fibre brands are available. It is always recommended, especially for less experienced growers, to buy the more expensive washed/buffered coco fibre. Dutch Passion also recommend the use of slow release organic nutrients, e.g. BioTabs, with coco fibre which simplify the nutrient considerations even further.
Indoor cannabis nutrient feeding schedule
Use of nutrients is one area that can cause difficulties, and even disasters, for growers. Fail to provide enough nutrients and your plant will be unable to grow adequately and may show nutrient deficiencies. Growing cannabis indoors with an accidentally excessive nutrient regime is an even more serious problem, in the worst cases the plants will be permanently stunted or will die.
The holy grail of nutrient management is to understand the plants nutritional needs at each stage of growth and meet them without over-feeding or under-feeding. The goal is to maintain your plants in the nutrient sweet-spot from the germination of your cannabis seeds all the way though to harvest. This is easier said than done, experience plays a large part. It pays to start with low nutrient levels and slowly increase, backing off at the first hint of nutrient burn.
It’s also important to use reliable pH and EC meters, calibrate them regularly and have replacement meters ready for the inevitable day when the meter starts to fail and give erroneous readings.
Use of bottled mineral nutrients does require care and precision. Get things badly wrong and you could wipe out your crop quickly, especially if you are growing with hydroponics where the impact is immediate. Experienced growers tend to feel less daunted with the task of managing an array of specialist nutrients. Rookie growers often feel understandably cautious when it comes to bottled nutrients and many prefer the simplicity and fool-proof nature of slow release organics instead (BioTabs) which allow the grower to simply add water to their plants for much/all of the grow.
Grow your premium indoor weed at home!
Growing cannabis indoors at home allows you to enjoy premium quality buds at a fraction of the normal price. Most home growers would say that they can grow better quality buds than they can buy.
You can choose the genetics, grow them to their maximum potential with a solid LED light and harvest the plants at the point of your choosing. The grow process can be as complicated and hands-on as you wish. Or it can be a simple, easy process where you need do little else other than water your plants. It all depends on how you want to grow and how much control you want to take.
One of the easiest ways to grow cannabis indoors is in large aerated grow sacks of soil with slow release organic nutrients. There really is little to go wrong with this method!
However you grow, do your best to learn as much as you can along the way and try to incorporate continuous improvements to your grow room. Growing cannabis indoors is not just an affordable way to supply yourself with premium buds, it’s also great fun and an enjoyable hobby for millions of people around the world.

New cannabis seeds!


9 Comments. Leave new
How close to put growing LED lights
It depends on the type/power of LED light you have, if its powerful start at 65cm for veg and bring it down to 45cm for flowering.
More Blue light increases the number of female plants ?
There is some excellent advice in this article. Dutch Passion has been producing world class genetics for decades. Whether you are growing indoor or outdoor, Dutch Passion will have seeds to fit your needs =)
where can I find the black and green pot in the header or first image?
Is it possible to explain when the veg state stops and the flowering state starts. I suppose the answer is in the question, but I’m a little unsure…?
I’m a first time growerAnd this was very informational for me
I have just set my tent up, have good ventilation etc but using 600w Lumin Black ballast/bulb. I am 100% commited to giving it a go, even helping fight to make changes to laws, (I plan growing enough to last me until the second harvest is ready, sick of buying crap from idiots!) however after germinating 4 seeds and potting them I started to panic….because I live very close to the Airport, basically on the route a certain flying object leaves and arrives on (FLIR). There’s also the sudden jump in my power use as I use a pre payment smart meter.
So…do I
1) Destroy pots, seedlings etc and dismantle tent and put it away/get rid?
2) Destroy pots, seedlings etc, leave it running and maybe put some legal plants in for a few months to see if FLIR is going to cause problems?
3) Stop worrying as the tent is in my bedroom and is actually about the same temperature inside as the room is, has extraction/filter into the room etc
4) run ducting to a window to filter warm air/remaining odours outside
I live in a small block of flats, ground floor but most of the neighbours smoke so it always smells of herb and nobody complains.
I don’t want to just quit, am I worrying too much?
Sorry I had forgot to also say, would getting rid of the light I have and investing in some LEDs reduce the chance of it being picked up by thermal imaging? Obviously they’re a bit cheaper to run too but do they produce as good results and would the loss of heat from the change of light mean I would have to add heat back to the area?
Thank you for any suggestions