top 10 seedling and germination mistakes

Most seed germination issues can be sourced back to the germination method. This is an area where Dutch Passion have extensive expertise and can offer accurate, professional advice for seed germination issues.

Dutch Passion has been helping growers with their cannabis seed requirements since the 1980’s. Few in the seed business can claim more experience. Many of the early problems that growers deal with involve issues with germination of the cannabis seeds and subsequent growth of the seedlings.

Below are the 10 cannabis seed germination topics which generate the most feedback and questions from growers. Hopefully you will learn something which can improve the success of your future grows.

Summary:
Watering too much, or too little… or both!
Germinating cannabis seeds outdoors
Overheating seedlings with heating mats
Fertilising cannabis seedlings incorrectly
Germinating seeds in jiffy pods, coffee filters and rockwool cubes
Damping off cannabis seedlings
Stretching seedlings caused by lack of light
Choosing the wrong type of soil to germinate seeds
Not transplanting autoflower seedling to a larger size pot in time
Sowing cannabis seeds too deep in the soil

1. Watering too much, or too little… or both!

Perhaps the most common seed germination issues are related to the amount of water (and the germination technique) used to produce seed germination. A lot of cannabis seed germination issues are caused when the seeds are overwatered and soaked. Soaking seeds, or giving them an environment with too much water, causes seeds to stagnate and stop developing.

Soaking cannabis seeds causes them to stagnate.

Soaking cannabis seeds causes them to stagnate.

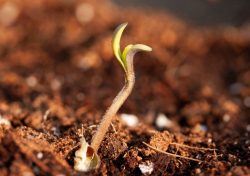
When a cannabis seed germinates, a small white root will emerge. However, if the cannabis seed is soaked for too long in waterlogged conditions the root will stop growing and eventually start to rot.

An indication of root rot is a brown colouration on the root or the root tip. Cannabis roots need oxygen as well as moisture to thrive. But if the roots are soaked for too long, there is insufficient oxygen for root health to be maintained and root rot can begin.

Conversely, seed germination issues are also seen when the cannabis seed dries out due to insufficient moisture. This can happen when growers try to germinate their seeds between moist cotton pads but forget to put them in a sealed container e.g a dinner plate sealed with some transparent kitchen film.

Without moisture, the cannabis root simply dries out and dies. Under high magnification you will notice that the tap root is covered with numerous delicate root hairs.

These will dry out and die unless the root is kept in moist (but never soaked) conditions. You will notice the cannabis root turning brown. Just as with an over-watered seed, once the root is showing discoloration and dying it is often damaged beyond repair.

Soaked cotton pads, saturated tissues or even waterlogged soil in a closed container all show the same issue when soaked. Soaked seeds won’t develop roots at all or they will stop their development.

So make sure your environment is moist but never soaked, and give your feminised seeds and autoflower seeds the best chance to germinate. Note that there are no differences in the techniques used to germinate feminised seeds and autoflower seeds, the same germination methods are used.

It’s also worth adding that the appearance of a cannabis seed (colour, size, shape etc) won’t have any influence on the speed of germination.

Related:
Everything you need to know about cannabis roots
What does the appearance of a cannabis seed indicate?

How much water should I use for a successful germination?

If you are germinating your cannabis seeds between lightly sprayed cotton pads, the pads only need 5 short sprays to moisten them. Remember, the key principle is to provide a healthy environment with both moisture and some air. If you try to germinate your cannabis seeds in a water-saturated environment for too long the roots will simply rot.

It doesn’t matter whether that environment is cotton pads, soil or any other material. Moist conditions will work, but sodden/saturated conditions will eventually cause the root to rot and die.

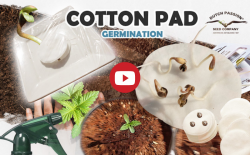
One of the most reliable ways to germinate cannabis seeds is simply to place them between two cotton pads which have been lightly sprayed 5 times with water. Just leave the pads for a couple of days in a sealed environment so that the cotton pads don’t dry out. The golden rule is to spray the pads lightly. Cannabis seeds thrive in moist conditions but can die quickly in soaked conditions

Related:
Cotton Pad germination video tutorial
Soil germination video tutorial

How long for germination of weed seeds?

Usually it takes somewhere between a couple of days to a week for your cannabis seeds to germinate. Occasionally seeds can take a couple of weeks. To avoid seed germination issues, remember the important basic principle for cannabis seeds; offer an environment which balances moisture with some aeration for root development. Therefore, germinating your seeds in a light soil mix will give better results than a heavy clay-based soil.

How often to water weed seedlings? / When and how much water to give to cannabis seedlings?

Watering should be offered only to keep the soil moist and prevent it from drying out. Remember that the small cannabis root (often called a tap root) will need to absorb very little moisture initially. The main focus is to allow the root to develop through a light, aerated grow medium which doesn’t obstruct the root growth, not should it allow the root to dry out.

2. Germinating cannabis seeds outdoors

Many people love to germinate their cannabis seeds outdoors, especially outdoor/greenhouse growers. Why not? That’s the way that seeds have evolved over millions of years to germinate.

However, it’s worth noting that in nature a plant can produce hundreds/thousands of seeds but only need a few of them to make it past germination in order for the next generation to survive.

Cannabis growers, on the other hand, like to see germination rates of 90%-100%, especially if they have bought premium cannabis seeds for their specific requirements and grow location.

Outdoor growers can struggle to achieve good germination rates

Outdoor growers can struggle to achieve good germination rates.

However, outdoor growers can struggle to achieve good germination rates if they rely on outdoor seed germination. Conditions can fluctuate dramatically, especially during the unpredictable early season weather.

Temperatures and/or weather can swing significantly between night and day, reducing germination rates and killing weaker seedlings. If the weather is cold and wet with persistent rain, the seeds may simply rot in the ground and never emerge. Even if they do, slugs/snails/birds may get to the seedlings before you do.

If the early season weather produces a heat wave, your seeds may dry out if the roots haven’t been able to reach deep enough for moisture. Germinating cannabis seeds outdoors may work for some seeds, but it’s not recommended for the highest germination rates.

Those that germinate cannabis seeds outdoors in containers may find that the containers get very hot in direct sunlight – especially dark/black coloured containers which absorb the sun’s heat. Temperatures around (or above) 35ºC/95ºF can kill the seeds/seedlings through excessive heat.

That’s why many successful outdoor cannabis growers prefer to germinate their cannabis seeds indoors where conditions can be opted to minimise seed germination issues.

What is the best temperature for germinating cannabis seeds?

The temperatures found in an average house, 20ºC – 25ºC are perfect for cannabis seed germination.

Many serious outdoor growers germinate their seeds indoors to maximise germination rates and then perhaps grow their seedlings indoors under artificial light for a couple of weeks to give them the best possible start before risking them in the great outdoors. It’s the best way to avoid seed germination issues and ensure the maximum number of your precious cannabis seeds make it into healthy adult plants.

Related:
Outdoor cannabis seed collection from Dutch Passion
Best ways to grow cannabis outdoors

3. Overheating seedlings with heating mats

For good cannabis seed germination rates you need both moisture and warmth. Seeds which might germinate at ambient indoor temperatures in summer may not germinate quite so easily in winter in a cold part of your house. Sometimes during the cooler months, the indoor temperature may need a small boost. That’s why many growers use an electrically powered, plug-in heating mat. This can be set to a specific temperature to provide the warmth required to avoid seed germination issues.

Overheating cannabis seeds will slowly cook and destroy your seedlings

Overheating cannabis seeds will slowly cook and destroy your seedlings.

The plant pots, or propagator, simply sit on top of the heat mat. These can be a great solution for cold periods in winter. However the Dutch Passion team have come across cases where heat mats are used all year round. In summer, this is unnecessary and can result in overheated plant containers and seeds which have been damaged/destroyed by the high temperature.

When indoor temperatures are already 20-25 ºC there is no reason to risk adding extra heat, especially if it can’t escape. The danger is overheated soil and sterilised seeds.

In combination with excess moisture/excess water, cannabis seeds and the delicate tissues inside are slowly cooked and destroyed. This can occur if the excess heat from the mat can’t escape and builds up in the plant containers over time.

Should I use a heating mat for germination?

Yes you can, but use them during colder periods such as winter time. You may also wish to use a thermometer to confirm that temperatures are being maintained within the preferred 20-25ºC range.

Use heating mats for with caution when germinating cannabis seeds

What temperature should I put my heating mat on?

Because heat can build up in soil or in a propagator, be sure not to set the temperature too high. Temperature settings of around 20-22 degrees should ensure a nice warm environment, without risking overheating.

4. Fertilising cannabis seedlings incorrectly

When seedlings first sprout they are very sensitive to their growing environment. Strong light at close range will damage their delicate leaf tissues easily. Temperature extremes and large temperature swings/cold nights can also be fatal to them. That is why you have to be careful growing your seedlings in the first 1-2 weeks.

Compost cannabis seedling nute burn

Compost cannabis seedling nutrient burn.

A common mistake seen by the Dutch Passion customer service team is excessive nutrition/fertiliser being given to seedlings. Cannabis growers often use a wide variety of nutrients/fertilisers to grow their plants. Sometimes they make the mistake of adding a lot of these during the first stages of growing. In the worst cases, this can permanently stunt growth, or kill the plant.

Seedlings and their delicate root systems can’t handle a nutrient rich environment very well. Nor were they designed to. The seedlings have everything they need for a healthy initial germination and development inside the seed itself. That is how nature made them. So when seeds first sprout, they don’t need any fertiliser at all!

When to start using nutrients with germinated cannabis seeds?

Many growers prefer not to add any fertiliser or additives during the first week of growth. Your seedling will not need it at this time, and will only be damaged if exposed to an excess of nutrients or fertiliser. If you are growing in a good quality soil, you may not need to add any extra nutrients for a week or two. Even then, you should only consider weak/starter nutrients and slowly build up concentrations.

5. Germinating seeds in jiffy pods, coffee filters and rockwool cubes

Of all methods used for germination, these methods are the ones that give the most issues and are often done incorrectly. This is backed up from customer feedback and the 35+ years of experience from the Dutch Passion customer service team. During the decades of seed supply, Dutch Passion (and their customers) have accumulated extensive experience of which cannabis seed germination methods are safe to use, and which are best to avoid.

Rock wool cubes cannabis seeds germination fail

Rock wool cubes cannabis seeds germination fail.

Of course, many growers will argue that these methods have always worked well for them. But that doesn’t mean that the methods are completely bullet-proof with a wide working latitude for everyone.

Some growers find that cannabis seed germination in jiffy pods work pretty well. The main concern for the Dutch Passion team is that these methods are not quite as bullet-proof with the same wide-latitude as the preferred method of germinating cannabis seeds between moist cotton pads.  

Experience from the Dutch Passion team is that there are many ways to incorrectly perform cannabis seed germination with jiffy pods, coffee filters and rock wool cubes. You may be better off using a safer, less troublesome method with a wider working latitude and reduced risk of getting it wrong. Therefore Dutch Passion recommends customers not to use them.

What is wrong with germinating seeds in Jiffy pods?

Water has to be added to jiffy pods in order to use them. The Dutch Passion team have seen many cases where growers completely soaked the jiffies before use. Other growers will even stand the jiffy pods in a shallow tray of water while seeds are germinating in them. In the worst cases, this results in a soaked environment in which cannabis seeds won’t germinate (or with reduced germination rates).

Jiffy seed pods work well for larger seeds e.g. beans, where there is less to go wrong. But for cannabis seeds there can be seed germination issues when used incorrectly and for that reason Jiffy pods are not recommended.

Jiffies cannabis seeds germination fail

Jiffies cannabis seeds germination fail.

What is wrong with germinating seeds Rock wool cubes?

Rock wool cubes are sometimes used for germination, but perhaps they are used more often for creating clones and allowing cuttings to develop new roots. For that purpose they work well. When used for germination, however, the same issues can occur as with the jiffies.

Overwatering, overheating or placing the seeds too deep in the rock wool (glasswool) cube can cause seed germination issues for less experienced growers. Therefore rock wool cubes are not preferred if you’re looking for a low risk method for germinating your autoflower seeds or feminised seeds.

What is wrong with germinating cannabis seeds in coffee filters?

One of the more unusual and unwieldy methods for cannabis seed germination is the use of coffee filters. The seed tip is placed pointing downwards inside a wet coffee filter, inside a large sealed bag. This is often hung from a hanger against a door or inside a closet. The idea is that the roots grow downwards by hanging them vertically.

Along with many things that can go wrong with this method, we feel it’s unnecessarily complicated, gravity will always make sure roots find their way down anyway. Therefore we do not recommend customers to use it. One of the main risks is that the coffee filter will hold too much water and soak the seeds, causing root rot.

Coffee filter cannabis seeds germination fail

Coffee filter cannabis seeds germination fail.

What methods work best for germinating cannabis seeds?

There are a lot of methods that can be used, but some have higher margins for errors. The methods may work fine for others but not necessarily you e.g. due to too much water being present at the root level. One of the most common cannabis seed germination methods is still the moist cotton pad method (or moist kitchen tissue). Customers are free to use a method which works best for them. However, the Dutch Passion team feel that there are less things to go wrong, and maximum chances of success with the moist cotton pad method.

Is soaking seeds in a glass of water a good germination method?

As previously mentioned, cannabis seeds like a moist environment but do not perform well in a soaked/saturated one. When they are exposed to a soaked environment e.g. several days in a glass of water, you may experience seed germination issues. This is especially the case when the seed is left soaking for long periods.

Many people soak their seeds in a glass of water for a day before putting them on moist cotton pads or moist kitchen tissue. The Dutch Passion customer service team feel that this is an unnecessary step. Seeds will absorb moisture from water or cotton pads in just the same way without the risk of root rot associated with over-soaking your seeds.

If you are planning to germinate your cannabis seeds in soil and wish to soak them in a glass of water first, we advise to soak them for no longer than 12 hours.

cannabis seeds like a moist environment but do not perform well in soaked/saturated one

Cannabis seeds like a moist environment but do not perform well in soaked/saturated one.

6. Damping off cannabis seedlings

Damping off’ is a disease which affects seedlings. It is caused by several different fungi (and fungus-like) organisms. This disease causes a thin stem which is unable to support the emerging seedling. The result is that the seedlings collapse, often under a white mass of fungal growth.

Damping off is most common in young seedlings and can be caused by overwatering your soil

Damping off cannabis seeds can be caused by overwatering your soil.

Damping off is most common in young seedlings and can be caused by overwatering your soil. It also happens when you use contaminated soil, e.g. from your back garden. The fungi Rhizoctonia and Fusarium, alongside Pythium plant parasites are the most common pathogens responsible for damping off. Note that Pythium is often transported around on the feet of fungus gnats, which can be a common pest in soils made with composted wood.

Once your seedling starts suffering from damping off, there is little you can do to save it.

How to avoid damping off my seedlings?

If you use fresh soil, and make sure you don’t overwater it, there should be little risk of damping off. Once plants have mature leaves and a well developed root system, they are better able to naturally resist the fungus that causes damping off.

7. Stretching seedlings caused by lack of light

After your cannabis seeds have successfully germinated it’s time to provide good care for your seedlings. This includes light, one of the most important factors for healthy plant development.

Once your seedlings have sprouted it’s important to provide it with good quality lighting, either natural sunlight or an artificial indoor grow light.

If the lighting is too powerful, it can kill a vulnerable new seedling. Some growers like to use specially designed ‘T5’ fluorescent tubes for cultivating seedlings, or perhaps some LED light bars designed for seedlings.

Stretching cannabis seedlings due to insufficient lighting

Stretching cannabis seedlings due to insufficient lighting.

But if the lighting is of insufficient strength, the seedlings will ‘stretch’ upwards in an attempt to find the light. In the worst cases, this can cause serious issues or cause the seedling to die. This happens when the elongated stem simply is unable to support its own weight.

Light remains one of the most important environmental factors in growing a cannabis plant. Growing in a poorly illuminated environment with low light levels results in a stretched out plant with few leaves that tend to be very small in size. Because leaves are the “solar panels” that collect energy for the flowers, your yield will also be minimal in low light conditions.

How do I fix stretching cannabis seedlings?

It’s not necessarily the biggest problem if your seedlings have stretched, so long as you support the stems in time. This can be done with a small support, such as a small stick/cane. Some growers support a stretched seedling with a short length of drinking straw which has been slit down the side with scissors.

Most plants will recover and grow up to become healthy plants. Once the seedling has sufficient light it will stop stretching and instead use the energy to develop bigger/more leaves and a healthy plant/root structure. If you have stretched seedlings in their original pre-grow containers, you can also fix the issue by transplanting them into a new container and covering the elongated stem with soil.

san light flex series vs fluoresced vs growspec vs CFL grow lights

The use of gradually increasing light is highly recommended for seedlings after a successful germination.

What is the best type of lights for cannabis seedlings?

The use of gradually increasing light is highly recommended for seedlings after a successful germination. Initially this can be done with relatively simple Fluorescent lights (e.g. T5/T8) or CFL’s (Compact Fluorescent lights). Both types are frequently used for the first couple of weeks after germination and provide the plants with ample blue dominant light for the first weeks of growth.

Other relatively inexpensive options are LED seedling light bars like the SanLight Flex series. These are long-lasting, high quality lights. Many modern growers have invested in specialist lighting for seedlings and get great results. But note that these seedling lights lack the power to grow mature cannabis plants. You will need a high powered light for bloom. HPS lights are a common choice and are cheap, though a high quality LED grow light will give a superior light spectrum, reduced heat stress, longer life and superior quality/results.

Related:
How to grow weed easily indoors, expert tips and advice

How do you know when it’s time to go from seedling to veg lighting?

Once cannabis seedlings are a couple of weeks old, many growers will move them from their ‘seedling light’ to a light which is a little more powerful. Allowing the seedlings a week or two to gain some strength before transferring them to a grow room containing the more powerful full spectrum lights is generally regarded as good practice.

Some lights that are perfect for seedlings are:

  • Fluoresced lights T5/T8
  • San light flex series
  • Growspec Sunray Series
  • California Lightworks Solar System Veg Light (Or SolarSystem + optional controller).

Since their introduction, LED lights have improved significantly. Affordability has also improved and LED is now the first choice for serious, professional cannabis growers.

Quality LED lights with full spectrum control can be used from the vegetative phase through to harvest. Light spectrum can be adjusted along the way ensuring that the plants always receive optimised light. The best spectrum for veg is the blue dominant spectrum with perhaps some white. Blue spectrum light (400-500 nm) will promote healthy vegetative growth producing large, strong and healthy leaves and branches.

Examples of LED lights with a full cycle (veg to harvest) controllable spectrum are those from California Lightworks and GrowSpec.  The California Lightworks Solar System series also includes purpose designed ‘veg’ lights with a fixed blue dominant spectrum.

Of course, cannabis seedlings can also be grown with excellent quality results under full spectrum (LED) lights as long as the correct light distance-to-canopy is maintained. Check with the manufacturers guidelines, which will vary according to the size and power of the LED light. Growers are often cautious to carefully acclimatise their seedlings when switching them from seedling lights to powerful ‘main grow room’ lights.

This can be done simply by ensuring that the main grow light is hoisted to a high position in the grow room, well above the seedlings. As the seedlings start to mature the light-to-plant distance can be gradually reduced. Once in full bloom, the plant is ready for maximum light levels.

When and how long to put seedlings under light? 

It’s best to refer to the specific guidelines from the lights manufacturers. Grow lights come in a wide range of sizes and power outputs designed for different hanging heights and different sized grow rooms.

How long to light seedlings? Most people give the seedlings 18-24 hours of daily light. This allows them to grow leaves, roots and branches but not buds. Flowering only starts when light hours are reduced to around 12 hours per day, usually after around 4-6 weeks of vegetative growth.

8. Choosing the wrong type of soil to germinate seeds

Using some soil from their back garden to germinate cannabis seeds is something the Dutch Passion customer service team sees from time to time. This is usually a beginner’s mistake, or an attempt to cut a few corners and save cash. But it really isn’t recommended.

Wrong type of soil to germinate cannabis seeds

Avoid using soil that is too sandy (or too heavy with a high clay content).

Sometimes the soil is healthy enough, and seeds will germinate without issues. But in many cases, the soil is too sandy (or too heavy with a high clay content). Garden soil may also contain unhelpful mould/fungi/pests or it may be too strongly fertilised. Often soil from the growers compost pile is used for seedlings.

The logic is that it is fresh, natural and perfect for growing. However, freshly composted soil can often be very nutrient rich. Perfect for mature plants, but toxic to seedlings, which are delicate and need only light nutrition (if any).

In other cases where garden soil has been used you may see mould developing over the soil surface, giving it a white discolouration. Seedlings affected by mould can have a high risk of damping off and dying.

What type of soil should I use for germinating cannabis seeds?

For the best result make sure you use clean, fresh soil. This can be found in a garden centre or grow shop. It may be described as a ‘light soil’ mix or a seedling soil. Don’t use strongly fertilised soil. Normal potting soil is often good to use. But for optimal results we advise a 50/50 mix of light-mix and coco substrate. This mixture is very easy for roots to grow in, and has just enough nutrients for the seedlings to get started.

When your seedling is 1-2 weeks old, the roots and plant can handle more nutrients and a very light feeding schedule can be used. When it comes to nutrients and young plants, err on the side of caution. It is better to feed plants with weak nutrients and slowly build up nutrient concentrations than to start with strong nutrients which can damage or kill young plants.

Also recommended are products like the Biotabs Starterkit. This allows you to prepare your soil in advance for the entire grow with slow-release organic nutrients. All you have to do then is water your plant, and leave nature to do the rest.

9. Not transplanting autoflower seedling to a larger size pot in time

Since the introduction of autoflowers years ago, this has been a common issue. While photoperiod plants can stay in a small container for a longer period of time during veg growth, autoflower plants may not always respond well to it.

Autoflowers benefit greatly from a good start and a decent sized container. Therefore providing good care of them during the first weeks is important. Remember that autoflower seeds produce plants with a fixed life span and no time to recover if they have been root bound in a small container for too long.

Potting up too late can damage the cannabis root system

Potting up too late can damage the cannabis root system.

A key role in this is the cannabis root system. Autoflowers have a main root stem that grows straight down. If this root is interrupted or damaged, it will result in a tiny plant. So it’s very important to transplant your autoflower to a large pot in time, also known as “potting up”.

Many growers will tell you that you have to germinate your autoflower in its final pot. However this can make the germination process a little more difficult. Instead, germination in a smaller sized container e.g. about 1 litre is a good alternative.

You can keep your autoflower in this pot for about a week (maximum 2 – 2.5 weeks) and then transplant it to the final pot. In many tests over the years this has never caused a problem. When “potting up” do make sure the main root has enough room to point all the way down, by digging a deep enough hole.

When and how to transplant cannabis seedlings in a bigger pot?

How to transplant a seedling? One easy way is to fill the larger container with grow medium and then make a ‘hole’ in it with the small container currently containing your seedling. This will be the perfect size for the root ball of your seedling. But make sure that you don’t over-compact the new grow medium when you make the hole.

Many growers will water the new grow medium well before transplanting the seedling in it, this allows the roots to quickly expand into their new territory.  Some growers sprinkle some beneficial Mycorrhizal bacteria into the hole to assist onward root development.

What pot size should I use to grow autoflowers?

When growing autoflower seeds most growers find that they perform well in any pot from 10 litres and above. However, because of the limited life cycle of about 11 weeks, there is no need to go much larger than 30 litres. And of course you can also plant your autoflower plants directly into the outdoor earth in your garden, without any pot restriction.

What pot size should I use to grow photoperiod cannabis plants?

When growing feminised photoperiod seeds, the plant can be maintained in veg growth until you are ready to reduce daily light hours to induce bloom. This means that you can keep a plant for several weeks in a smaller plant container, perhaps 10 litres or so, until bloom.

As you get ready to flip the plant into bloom, many growers will take the opportunity to first transplant it into a larger container. But much depends on the space constraints in your grow room, the number of plants you wish to grow, the period of veg growth and other factors. There will be a large difference, for example, in the container sizes used for Sea Of Green (SOG) growing vs Screen Of Green (SCROG cannabis cultivation method).

10. Sowing cannabis seeds too deep in the soil

Cannabis seeds don’t need to be buried deeply to germinate well. Placing your autoflower seeds or feminised seeds 3-5mm deep is sufficient for a fast and healthy germination. Your seed should not be deeper than 10mm. If you place the seed to deep, it will have trouble making it to the surface. While it’s trying to do so, the risks of rotting, overheating and getting damaged increase.

Sowing your autoflower or feminised seeds 3-5mm deep is sufficient for a fast and healthy germination

Sowing your autoflower or feminised seeds 3-5mm deep is sufficient for a fast and healthy germination.

In rare cases some growers have been known to simply scatter their seeds on top of the soil, like sowing a grain field. This method is definitely not recommended.

How deep do you sow cannabis seeds?

We advise a 3-5mm depth. But make sure not to go deeper than 1cm.

Bonus tip: How to get the seed shell off a weed seedling

Many growers have been tempted to ‘help’ their plants germinate by trying to pull the seed shell off the weed seedling. This is simply never recommended. Pulling the seed shell off before it is ready can damage the seedling which derives some nutrition from the seed before it is discarded.

In the worst cases, the seed shell simply sticks to one of the cotyledon leaves (the first pair of baby leaves) where it will do no harm. Just leave the seed shell, it’s not worth risking the removal of it.

Auto Skywalker Haze seedling germination seedshell

Hopefully this article has given you some useful advice and helpful information. Cannabis seed germination isn’t difficult if you follow a few proven rules and principles. Good luck, and enjoy growing!

14 Comments. Leave new

  • vasileios vasileiadis
    09/12/2020 21:28

    excellent article thank you very much Dutch passion,realy good one.

    Reply
  • Had a seed shell stuck, so much that it ripped off the other cotaledan off at the base. It’s almost three weeks old now, still just a nice green 1 coteledan leaf, sure hope she pulls out of it and grows. 🌱 As long as it stays sturdy and green I’ll let it be. Let ya know what happens. If and when that may be, I try to make a few leafs appear everyday when I scope it, but so far nothing yet. There’s still hope🌱
    Reply
    • JOSEPH THREAPLETON
      31/12/2020 12:55

      if your talking about an auto my friend then that seedling is finished due to the life span they have once they sprout they have a life span of about 10 to 11 weeks and in that time they have to veg and flower if ur veg cycle is weak then ur flower cycle will be almost none existant

      Reply
  • JoJo Palella
    05/02/2021 01:44

    Can I start my seeds inside in my grow room, and then transfer them to my greenhouse with different lighting and different lighting time due to the early season?

    Reply
    • As long as you are not too early in the growing season this should be fine.

      Your plants can get a nice start if you start the growing process indoors 🙂

      Greetings,
      Joe
      Dutch Passion

      Reply
  • Thanks for the actual sound information, I wish I found this a few weeks ago. As a new grower I’m finding the hardest part of growing to be finding solid reliable information amongst the sea of first year masters.

    This is my first year growing from seed and am 1/7 with my first batch and 1/14 (two days in) on my second run of seeds. I’m gearing I’ve over watered both times in my pods. Is it worth while trying to ring them out to try and dry them out a bit or just leave them be and pray?

    Reply
    • We are very welcome!
      When seeds are starting to germinate they are very delicate, so I do not advice you to try to take them out and let them dry. Best to hope these will survive and next time you should follow our guides 🙂

      Good luck!

      Greetings,
      Joe
      Dutch Passion

      Reply
  • Bud Farmer
    19/03/2021 15:06

    I have a small amount of seeds from a plant I grew last year. Second generation. Unknown origin. Extremely potent. The female plant sprouted a single male pollen sac stem, and produced the small amount of seeds on the plant. The seeds are like no other that I have ever seen in my over 50 years of using, and over 10 years growing cannabis. When put in a small container, they stick to each other, and glaze over with a resin-coated glaze. Have you ever seen or heard of seeds like these? Even when removed from container and separated, then put back in container, they reglaze over again. Excited to attempt to grow this year, outdoors. Any germination tips for such sticky seeds? Thank you!

    Reply
    • Hello Bud Farmer,

      That’s is a strange occurrence you have with your seeds, the thing we think of when you say a resin-coated glaze is THC. But this is not a normal thing for seeds to contain. Our advice is to stick to the regular germination advice we give here and wish you good luck with this years grow!

      Greetings,
      Joe
      Dutch Passion

      Reply
  • I have never grown a plant before. I hot some homegrown and it was littered with seeds, so I planted two, and now have two plants. The are doing well, I can see the little round leaves, then two little pot leaves, and today I noticed two more little pot leaves growing from the middle of that. They are loving the outdoors. I water in the AM and in the PM. I have been doing alot of reading, and now I am so confused. What stage am I in and what should I be looking for if they are doing good? Oh, and how do I know if it is a male or female?

    Reply
  • RickJames
    20/08/2023 12:48

    nice read

    Reply
  • Dana Sinclair
    08/11/2023 11:56

    Hello Bud, d-rip here. Been growing since the 80’s. Back when high times mag, was great info. Over the years have had a similar occurrence. First your plant turned gay. That happens usually from stress. I look into my last several weeks of bud stage. So it doesn’t reoccur. All those seeds are female. During your grow watch for deformity. Like 3 branch growing out where should only be one. But mine actually came out pretty tasty. I’m new to this forum. But so far its far more informative than any of the others about. Thanks to all the Dutch team.

    Reply
  • Orange County Weed Delivery
    01/09/2024 07:51

    This article on seed germination and seedling mistakes is incredibly helpful! I had no idea there were so many things that could go wrong, like overwatering or using the wrong type of soil. The tips on avoiding common issues, such as not overheating seedlings and making sure they get the right amount of light, were eye-opening. It’s clear that a lot of care and knowledge goes into successfully growing cannabis plants. Thanks for breaking it down so clearly—this has really helped me understand how to give my seeds the best start possible!

    Reply

Leave a Reply

Your email address will not be published. Required fields are marked *

Fill out this field
Fill out this field
Please enter a valid email address.
You need to agree with the terms to proceed

The reCAPTCHA verification period has expired. Please reload the page.

keyboard_arrow_up